

How to add I-SIP URN number in ICICI Netbanking
Investing in mutual funds just became easy! Now you can enrol for systematic investments plans (SIPs) online using the i-SIP facility. It is an absolutely paperless facility.
Under i-SIP, you may initiate an SIP for funds using a secure and automated gateway. To use the i-SIP facility, you need to have Netbanking-enabled account which needs to be KYC compliant as well.
The bank where you are holding a saving account has to be the one approved to offer an i-SIP facility.
You can follow these easy steps to avail an i-SIP facility.
Steps to activate your SIP through ICICI Netbanking:
- Go to ICICI netbanking page
- Login with your ICICI netbanking credentials into your account.
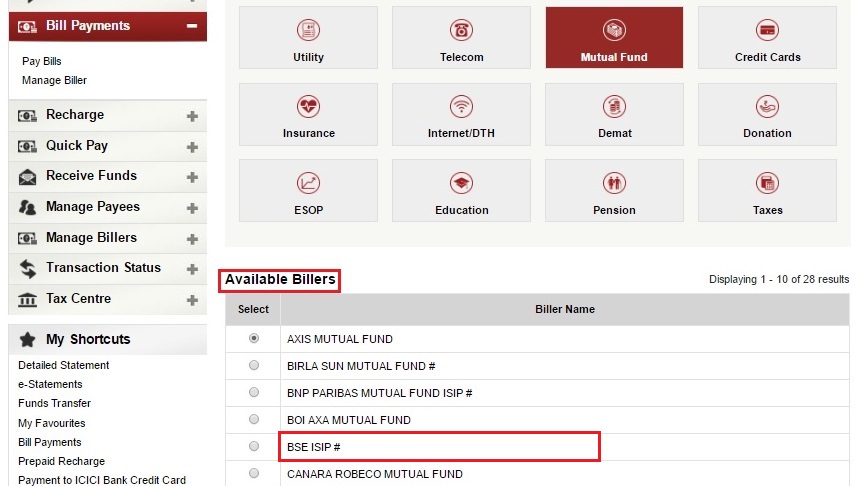
- Go to Payments & Transfer > Bill payments

4. Click on Register.

5. Select Mutual Fund Option.

6. Select the mutual fund company that you wish to add (Eg: BSE)
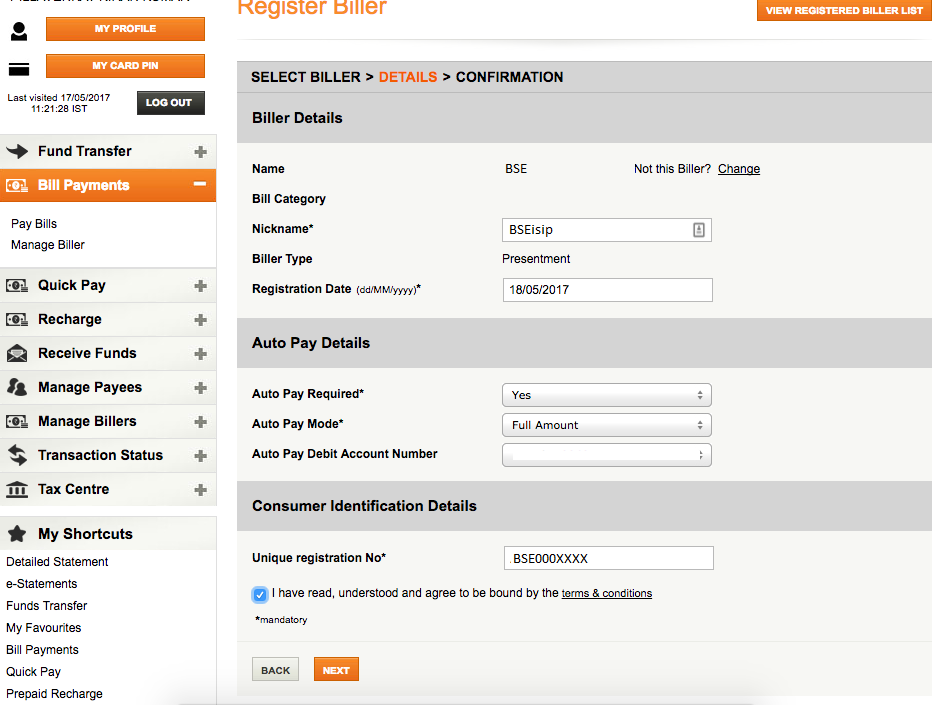
7. You will come to the biller details screen. Enter the following as described in the image below:
- Add any nick name to identify the SIP(Eg: BSEisip)
- Set Auto Pay required as Yes.
- Set Auto Pay mode as Full amount.
- Select account from which money should be deducted.
- Add unique registration number(URN) for that fund shared with you.
- Click Next
8. Check all the details you have entered and click on submit
9. Enter OTP received on your mobile.
10. Click confirm to complete mutual fund SIP registration.

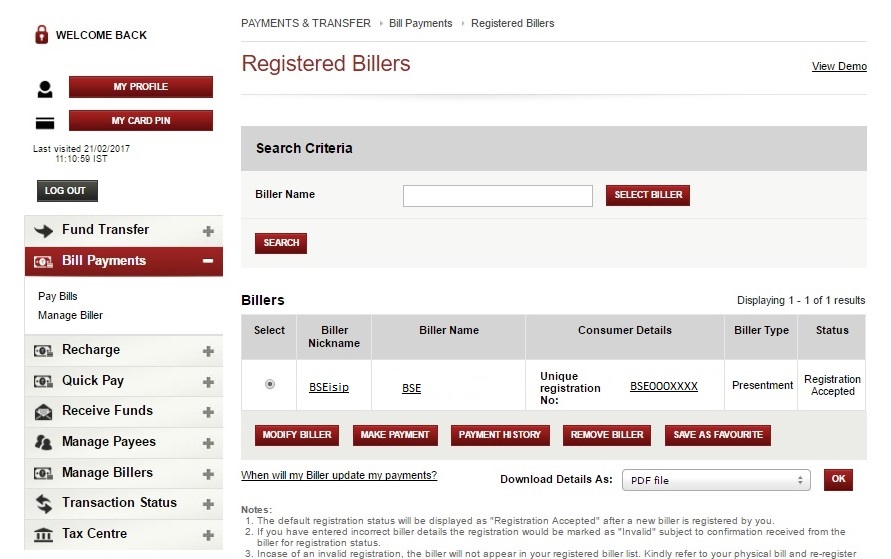
11. You will see that the biller has been approved on the confirmation screen.

12. You can view the added billers under registered billers section.
Why should you do this?
- Hasslefree You do it once and every month your investments get done automatically.
- Paperless No need to sign any cheques or courier any documents.
- Secure It's completely safe as all your investments go through your ICICI netbanking account.